(continued from Supplier Currencies)
Service Defaults allow alternative locations and addresses to be entered against suppliers that can have multiple pickup and dropoff locations, (e.g. Rental Vehicle operators). The first condition to consider before setting up the Service Defaults, is that the supplier that is having the pickup/dropoff points added, is the supplier – i.e., for the example being shown, Maui Rentals is the supplier, and they only have pickup/dropoff locations at other cities, not reservations and accounting offices. In the Product Database, the service(s) will be set up with the generic location ‘NZL’ (New Zealand). In bookings, the alternative locations can be used to find and book the service(s).
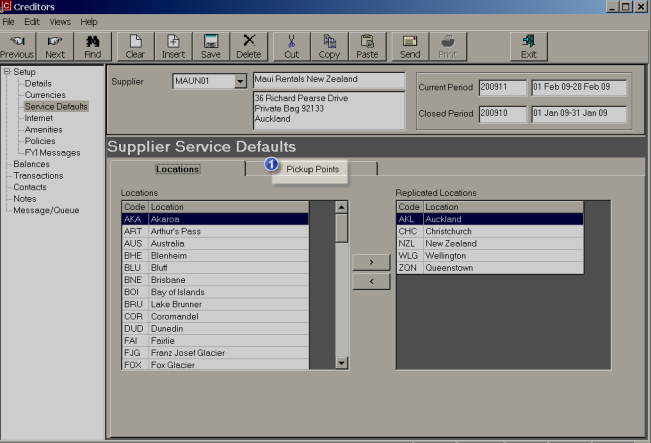
Screen Shot 12: Supplier Service Details Screen

A list of available locations (as set up in CodeMaint – see Supplier Details Screen) displays on the left of the screen. The suppliers pickup/dropoff locations can be highlighted (individually) and moved to the Replicated Locations column on the right by clicking the > button.
When all locations are added to the Replicated Locations list, click on the ‘Pickup Points’ tab  to add pickup/dropoff addresses.
|
|
The generic location of the Service Option (NZL in this example) must also be added to the replicated locations. |
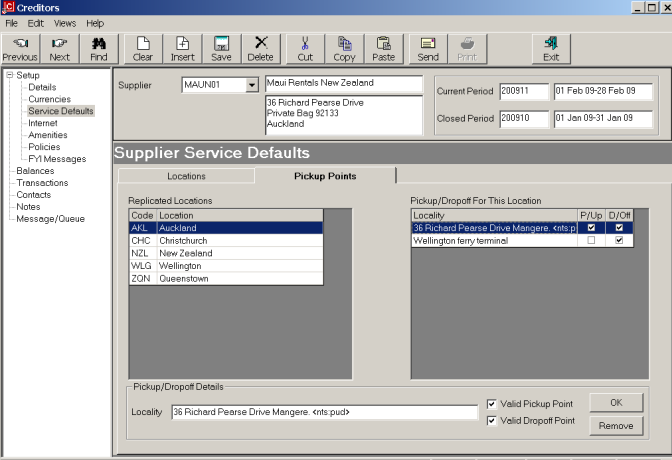
Screen Shot 13: Locality Pickup/Dropoff Details

Add locality addresses and indicate in the check boxes to the right of the Locality field whether the location is for Pickup, Dropoff or both. When the locality details have been added, click the Add button and the address will display in the ‘Pickup/Dropoff For This Location’ column
|
|
In this example, the supplier MAUINZ is only set up in the Product database against the generic Location NZL. However, in quotes and bookings, it will be available at all of the replicated locations. |
When used in Quotes/Bookings, the locality addresses are automatically available as valid Pickup/Drop Off points, which can be used in client documentation.
To continue setting up the supplier, click the ‘Forward’ button on the Wizard bar. This will display the Internet Details Screen.
To cancel setting up the creditor, click the ‘Exit’ button on the Wizard bar.
If any item on previous screens needs correcting, use the ‘Back’ button on the Wizard bar.
(continued in Internet Details)